Technically, it’s not the same app, nor does it have the same name as net speed monitor. But currently, there are two solutions that let you add a net speed monitor to your Windows 11 taskbar. Both of them are free and easy to set up as well.
How to Add Net Speed Monitor on Windows 11 Taskbar
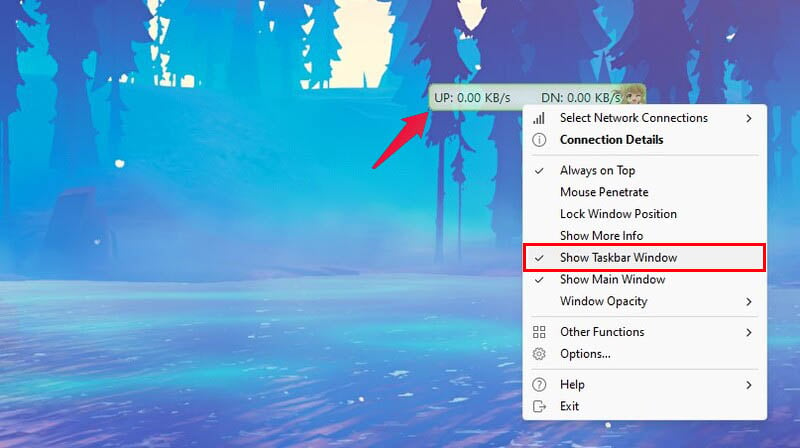
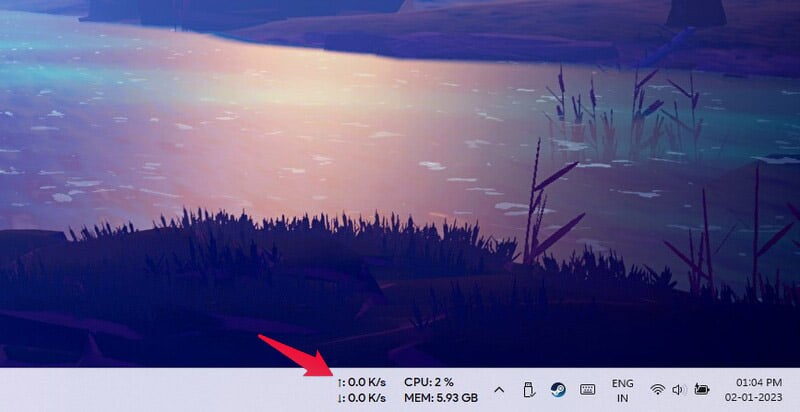
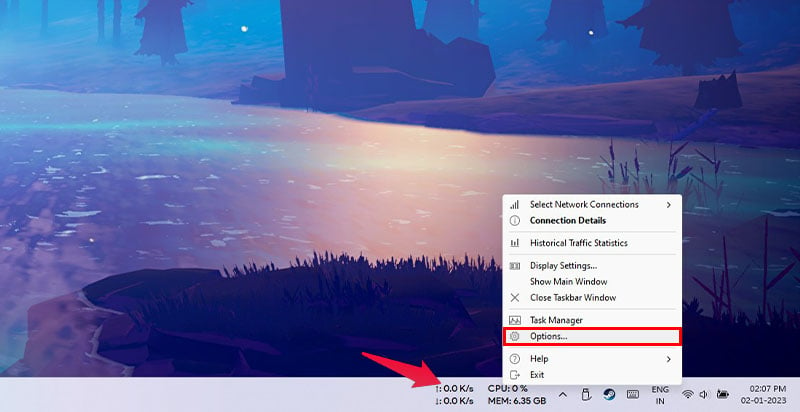
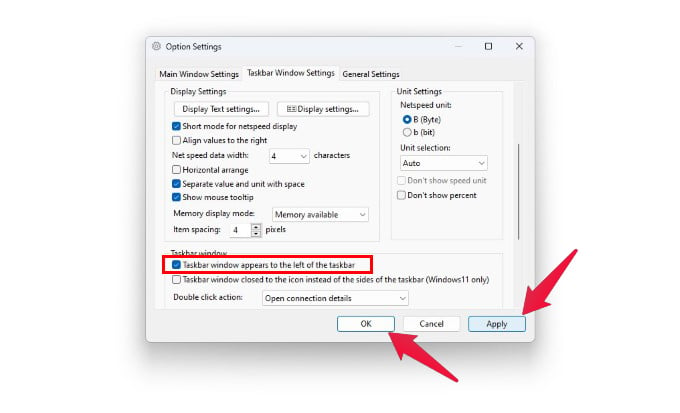
We’ll start with my favorite among the two available options. This one is called Traffic Monitor, and it’s unfortunately not available on the Microsoft Store. You can get it from GitHub, but you should know the developer of this app is not the Microsoft team. If you don’t want to trust third-party Developers, you probably would want to steer away from this one. As soon as you do that, you should see the traffic monitor on the right side of your taskbar. You can also hide the desktop window if you don’t like it by right-clicking on it and clicking Show Main Window to toggle it off. On Windows 11, by default, the taskbar icons are in the center. While you do have the option to move taskbar icons to the left, not everyone wants to do that. This creates a situation where you have all your icons in the middle, and on the right you have more icons. That is very unsymmetrical and aesthetically unpleasing, at least for me. If you think so as well, you can move the net speed monitor, or TrafficMonitor, to the left as well. To do that, right-click on the TrafficMonitor and select Options. Under the Taskbar Window Settings tab, select Taskbar window appears to the left of the taskbar and then click OK. As you might notice in the screenshots above, you can also see the CPU and RAM utilization alongside the net speed monitor on my Windows 11 taskbar. You can enable those options in the Options Settings window, as well as customize the whole thing to your preference. The best feature I like though is that TrafficMonitor automatically adjusts the font colors based on the color of your taskbar. So if you switch from light mode to dark mode or vice versa, you don’t have to manually change the font color for TrafficMonitor as well.
Alternative Solution to Add Internet Speed Monitor on Windows 11 Taskbar
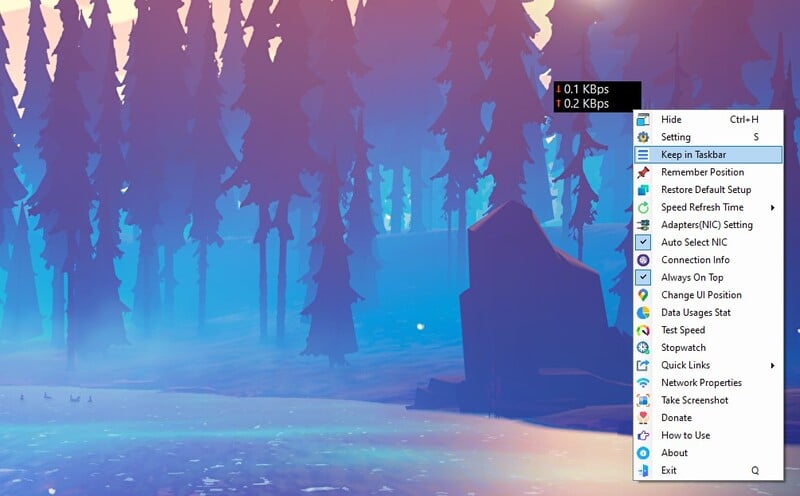
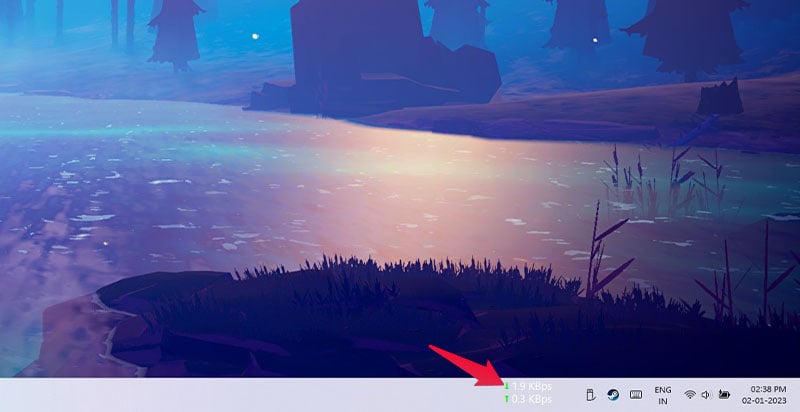
There’s another app that you can lean on, albeit with fewer features. It’s called Net Speed Meter, and it does what net speed monitor did for Windows 10 and below. Alternatively, you can right-click on the net speed meter and click Keep in taskbar. That’s it. You now have a net speed monitor for Windows 11 on your taskbar. Unfortunately, the style of the arrows doesn’t fit in with the modern Windows 11 aesthetics. And as you can notice in the screenshot above, it also doesn’t change colors according to the taskbar. You will have to manually do that. And you can easily do that by right-clicking on the net speed meter and selecting Settings. In the settings, you can change plenty of things about the looks of it. If you’re not switching between light and dark mode often, you might not care about the lack of auto theme switching. In which case, Net Speed Meter may even be a better choice. Because it can be moved to pretty much any location on the screen or the taskbar. Left, right, center, somewhere in the middle, you have the whole canvas. Most people don’t even think twice about it, some people often feel the need for it but don’t do something about it. But some people just have to be able to see the network speed with a quick glance. If you happen to be someone like that, Windows 11 must’ve come with a major setback for you. And in that case, you now know how to add a net speed monitor on your Windows 11 taskbar.
Δ


