Let’s have a look at the step by step solution to use this inbuilt free screen recorder on Windows 10 to capture the screen into the video.
Set up Windows 10 Xbox App
The chances are that you haven’t checked out the Windows 10 Xbox app if you are not into PC gaming. If that is the case, the first thing to do is open up the Xbox app and log in to your Microsoft account. But If you are a hardcore gamer and a regular Xbox app user, kudos! You are already there. Go to Settings in Windows 10 and Gaming Menu. There we can find out whether the Game bar is enabled or not.
Record Screen in Windows 10
After setting up the Xbox account, it is pretty straightforward. Open any app you want to record and use the hotkey combination: Win key+G.
When doing this for the first time, a dialogue box asking ‘Do you want to open game bar?‘ will be shown. Check the ‘Yes, this is a game‘ box; this would open up the game bar on any screen.
The game bar has some control buttons such as Screen capture, record button, and broadcast button. Click on the red record button to start recording the video of the app currently active.
Whenever it is time to stop the recording, press Win key+G again and click on the red square button.
The video will be automatically saved to your local disk when you click the stop button. Also read: How to Record iPhone Screen with Control Center
Watch the Recorded Screen video
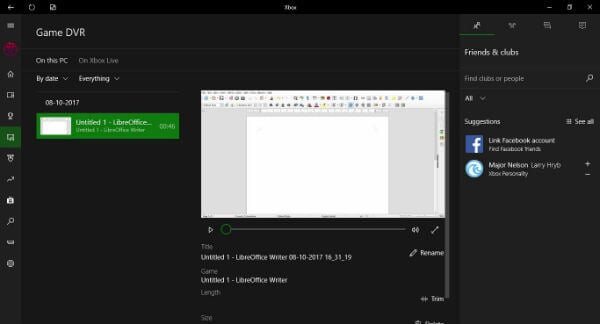
You can access the Windows screen recorded video by heading to the Xbox app and then selecting the Game DVR menu. Here the video can be played back, and limited editing can be done on the video.
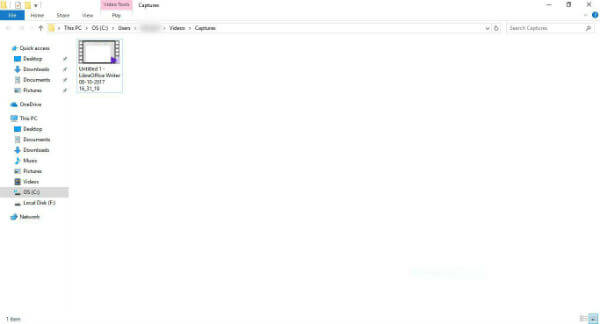
However, if you don’t want to open the XBox app to play the screen capture of Windows, you can open the video direct from file explorer.
Go to Windows File Explorer and head to Users >(username) > Videos > Capture. You can see the Windows screen record here and you can use to “Open with” to open with any video editor for post-processing.
Customize Windows 10 Screen Recorder
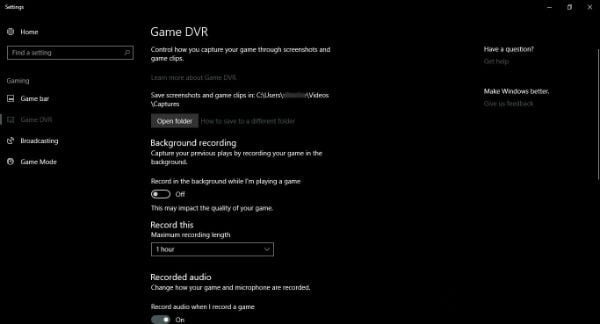
Users can have some control over the Game DVR feature in the Settings menu of Windows 10. Go to Settings > Gaming > Game DVR. You could also go to the Xbox app > settings bar > Game DVR tab to achieve this. From this settings window, you can change the duration of recording time, choose the audio quality, set the video quality and tweak the frame rate. You could also change the hotkey combination by going to the Settings > Gaming > Game bar.
Windows 10 Inbuilt Free Screen Recorder
Windows 10 has it’s easy to use interface along with the extra security feature that the modern world demands. But the latest Windows 10 update has also got a bunch of hidden capabilities, which the users usually take some time to stumble upon or never find for that matter. This happens because Microsoft has kept many of these features under multiple layers. Windows 10 has an impressive free screen video recorder app hidden under some layers, which you know and can explore further. By default, the recorded videos are in the standard MP4 format. Hence, the recorded files do well to keep up with a quality of the content. In addition to the Screen recording features, Windows 10 includes a lot more features that come with the Game Bar like the Game mode which enhances your gaming experience. Clicking on the camera icon on the Game Bar (or Win+Alt+PrtScn) lets you take screenshots. Compared to other full-fledged screen recorders, the Game DVR screen capture feature has its limitations. For one, Screen recording does not work the entire screen but for a single app. So when the need comes to record multiple app windows or the whole screen, better look for third-party screen video recording software. But if you decided to stick with the inbuilt screen recording on Windows 10, it lets you record up to two hours and this is absolutely a free screen recorder to use with Windows 10.
Δ


